I have said that before, but it’s not a secret to anyone that WordPress is the most popular site-building application out there. This means that hundreds, if not thousands, of people are transferring their WordPress websites every day. Whether it is from from one web host to another, between hosting accounts, or folders within a hosting account, the process is the same.
Here at WebHostFace, we transfer numerous websites on a daily basis and most of them are built with WordPress. So, let me share our secrets on how to transfer your website like a pro.
First and foremost, there are 3 parts essential to transferring any WordPress website: files, database and domain name. The domain name tells your visitor’s browser where to find your site, the database contains your settings and post information, and the files are the core files for your site, themes and plugins.
Changing where the domain leads your visitors should be the last step, so let’s start with moving your files first. There are various ways you can accomplish that. The surest way which works in most of the cases is using FTP. Just connect to your hosting account through FTP, find the folder where your website’s files are located, archive everything and download it to your computer.
Another way to download your files is through your control panel’s file manager. The most popular hosting control panel, cPanel, has a convenient File Manager which lets you very easily find, select, archive and download the files you want.
Another possibility is to download a backup from an application auto-installer like Softaculous or from a WordPress backup plugin. This won’t work in all cases but the database is included in the backup and that will save you a little bit of work from the next step.
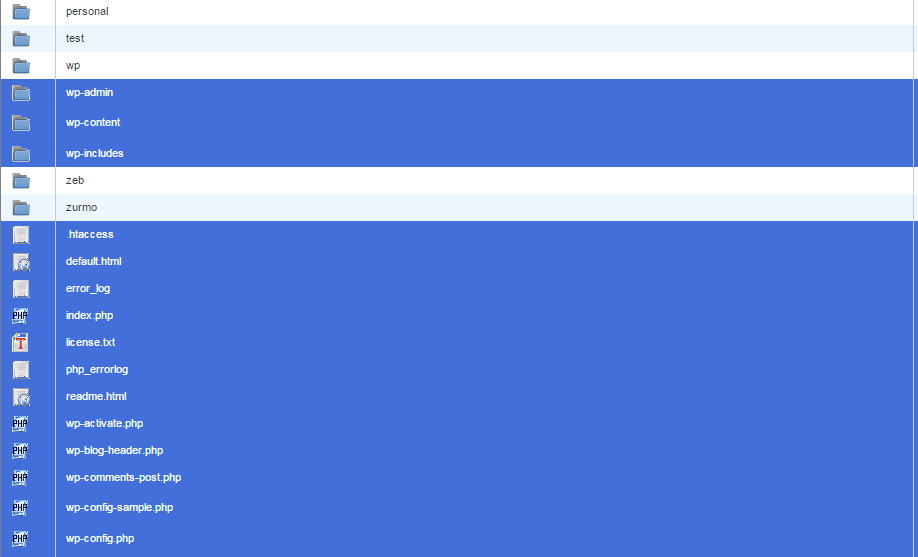
*Note: If your website is located in the public_html folder, be careful not to select folders which contain other websites’ files.
After downloading the files from the old account, you should use the same steps to upload the files on the new account and extract them. You can only use FTP or a file manager in this case and just upload the archive in the folder of choice and extract it.
*Note: Before uploading the files you should make sure you have the website’s domain included in the new account’s control panel and there is a folder designated for the website. Public_html is usually used for primary domains.
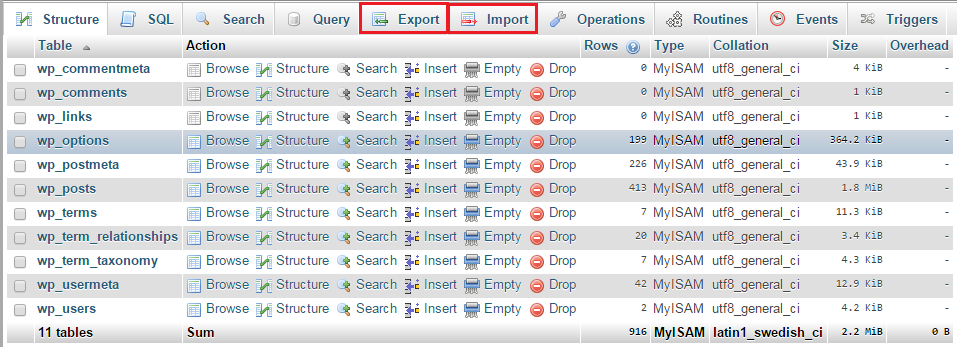
The next step is to move the database to the new account. Most hosts give you access to your database with either database management tools like phpMyAdmin, or through remote database connection. Either way all tools have some sort of export feature you can use to download your database so just use it to download the database to your computer. If you have the database within a backup you have downloaded, extract it in your computer to have it ready for importing.
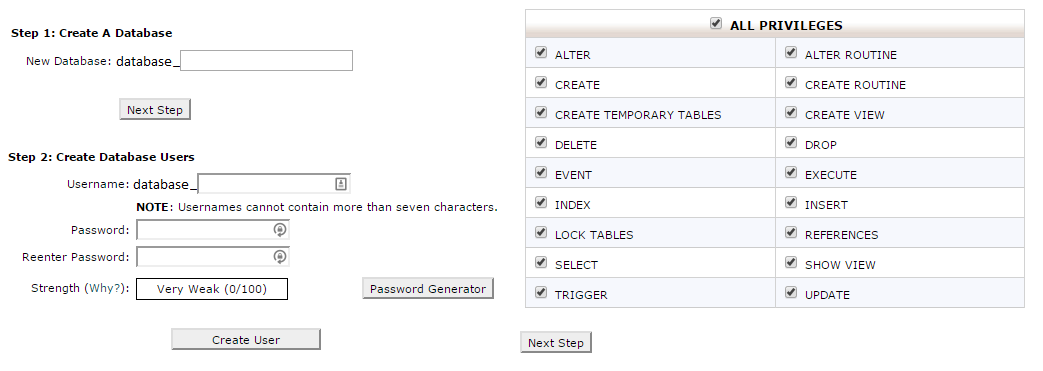
Use the same database management tools on the new account to create a brand new database. In the case of WebHostFace you can use the MySQL Database Wizard, create a new database, database user and a password. You can fill in any database name , user and password but write them down somewhere as we are going to need them later. Give all privileges over the database to the user you have created and after everything is ready, use phpMyAdmin to open your new empty database.
There is a simple import feature in phpMyAdmin which lets you browse and easily upload your existing database into your new empty one. With other tools, the process might vary a bit but the end result should be the same.
Now that we have the files of your WordPress site on the new account and the database has been imported too, we should connect them with each other. You have to tell your WordPress installation which database to use, to do that you should go to your website’s folder, preferably through your File Manager. Find the file wp-config.php, click on Code Editor and change the 3 fields representing the database name, user and password with what you had created earlier.
define(‘DB_NAME’, ‘database_wp’);
define(‘DB_USER’, ‘database_wp’);
define(‘DB_PASSWORD’, ‘thisisatestpass’);
Now your WordPress website has an identical copy on your new hosting account, all you have to do is point your domain to the new account’s name servers and wait out the transitional period. Domain DNS changes need some time to propagate all over the world and in the mean time some people will be opening the website from the old host while others will be seeing it from the new one. I recommend you not to make any changes to the website or remove the files from the old account during this period, which usually takes around 24-48 hours.
That is it, you now know our ‘deeply kept’ secret how to transfer a WordPress website like a pro. This is the first of a series of WordPress oriented post and you can expect a new post on the topic every week. If you want to subcribe for the WordPress Series , use the ‘Subcribe to WebHostFace oprion on the right’ and you will get to read our new blog posts before anyone else. If you have any question or transfer experience, don’t forget to share them with us in the comments below, we reply to everyone. I also accept suggestions, so if you have a great idea for a WordPress post, share it with me.
If you also need help with your website transfer to WebHostFace, we will gladly save you the trouble and do the transfer for you, just contact us.


