Uploading files from your windows computer using FileZilla is simple. In this article, we’ll show you how to upload a file using FileZilla on Windows.
Before We Begin
If you’re going to be uploading your website’s files you need to know where exactly to upload them. You can read our article on finding that out from here – Domain Document Root.
In our example, we’ll upload the files of a website.
Uploading Files using FileZilla on Windows PC
1. Connect to your cPanel account with FileZilla. You have two options to do that

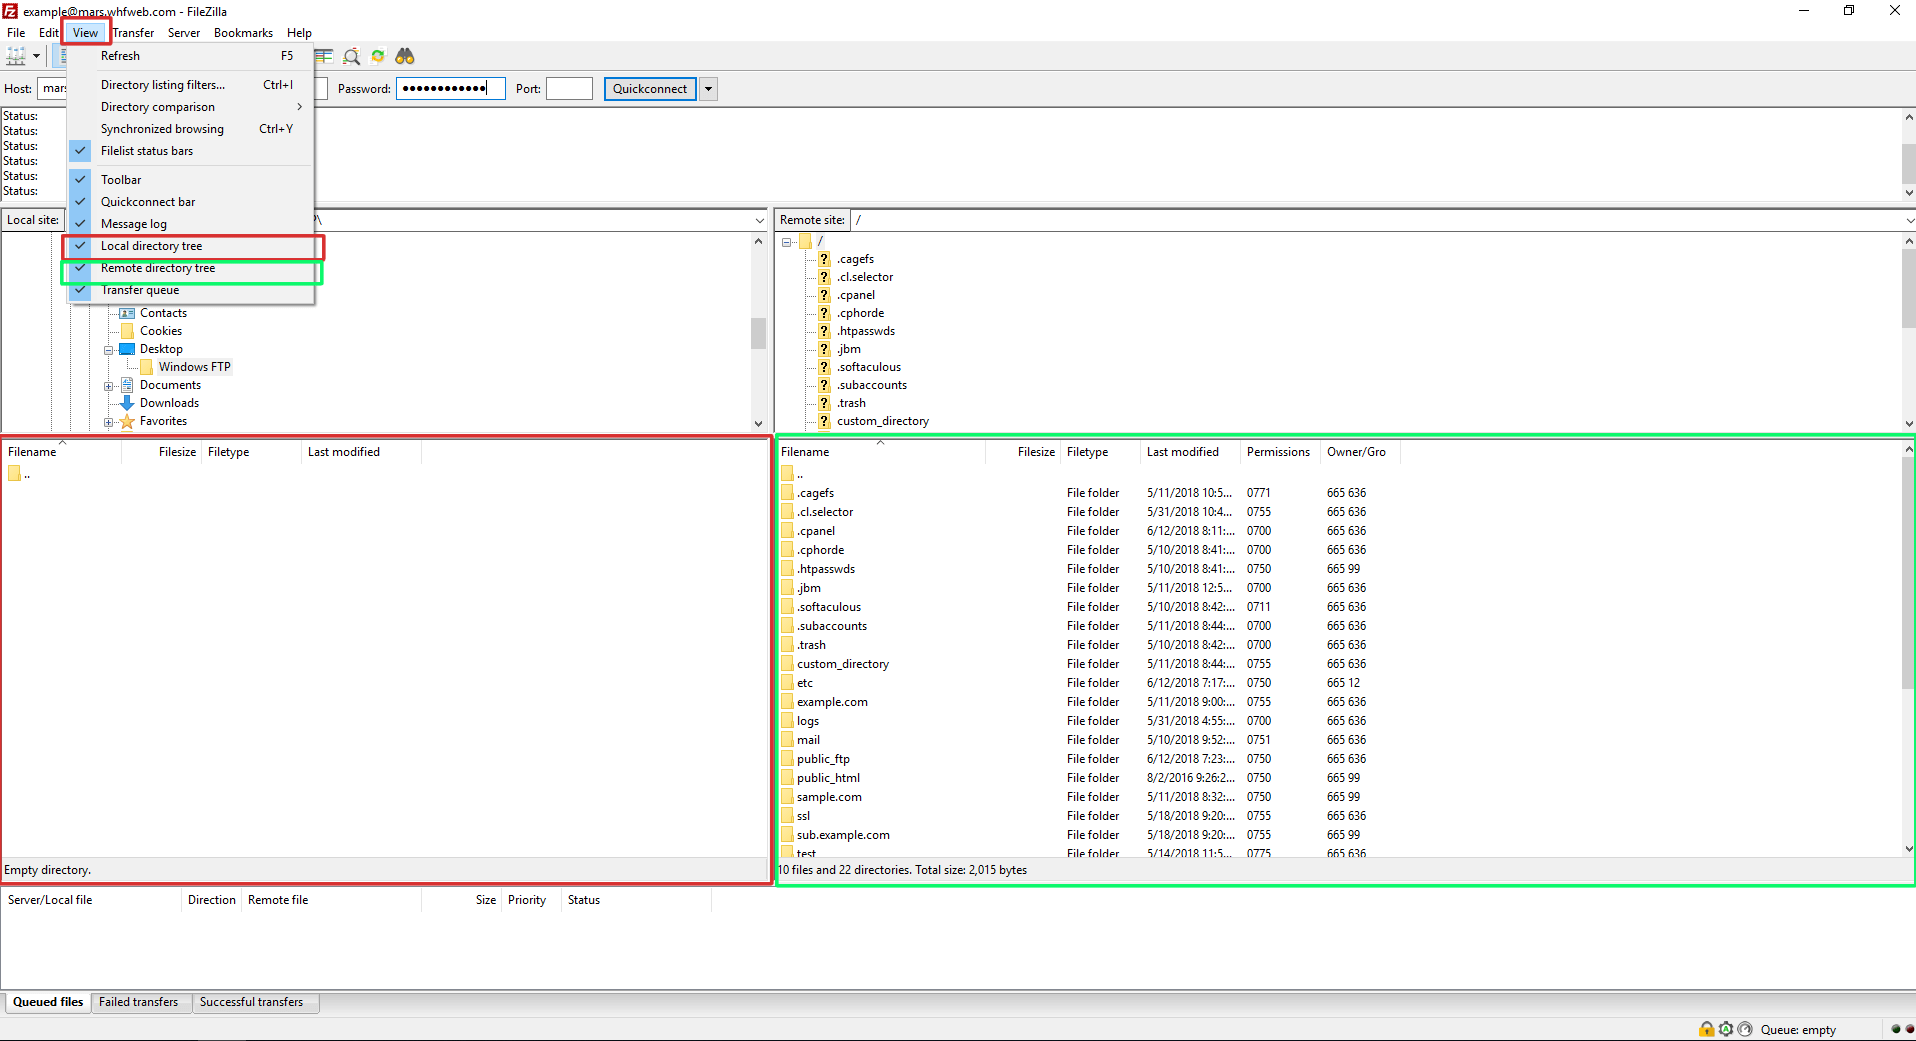
2. You need to have Local and Remote Directory Trees enabled. This can be done through FileZilla -> View
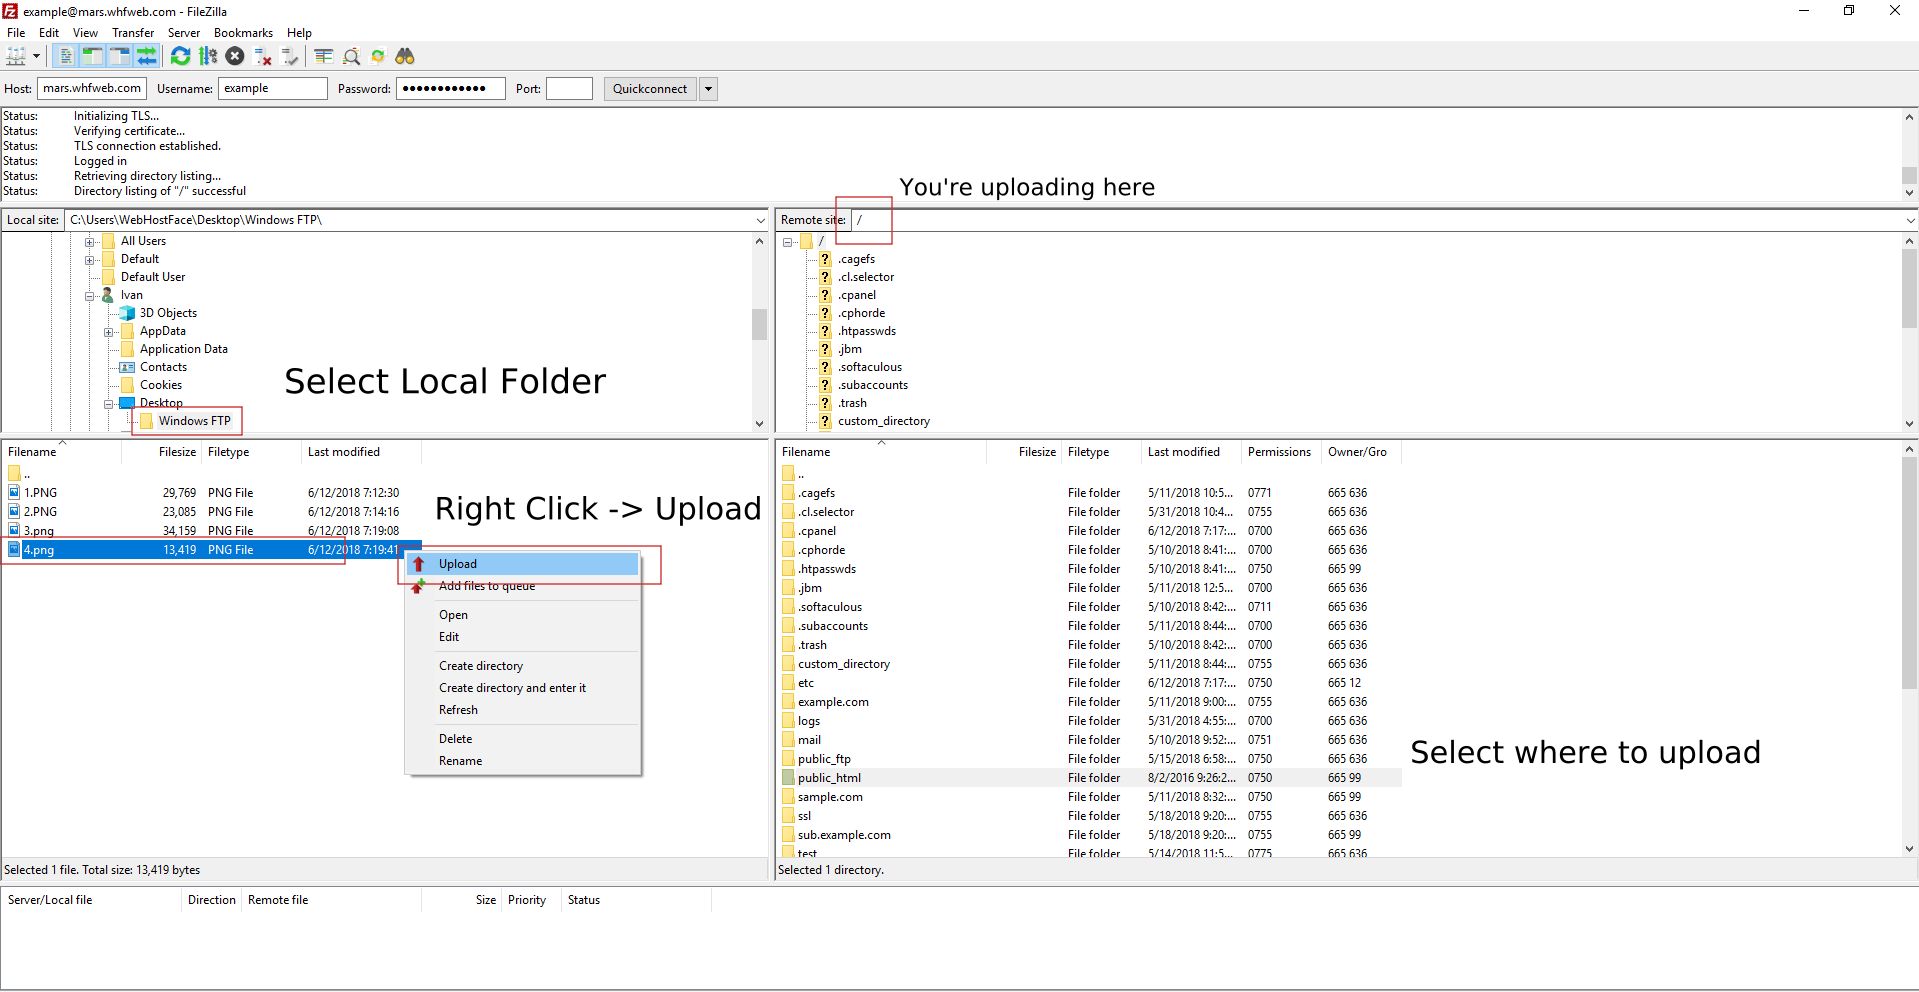
3. Select your directories and upload the file
- Local Computer’s Folder – this is the folder that contains the file that you will upload.
- cPanel Directory – where in your cPanel account to upload the file.
- Upload by Right Click on the Local File -> Upload
Get a new shared hosting FTP account and start uploading your files right away. Now with a great discount off the regular price.
