If you are using our hosting packages, then you can quickly and easily install Zurmo through our cPanel auto-installer – Softaculous. If, however, you want to install Zurmo manually, then follow this simple procedure to do so:
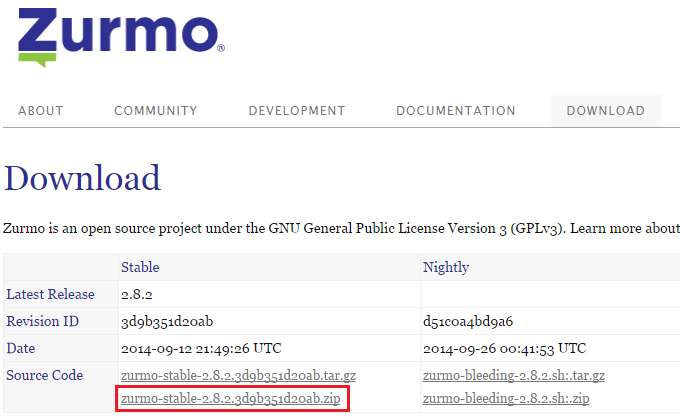
- The first step is to download the Zurmo installation package from the official Zurmo website. Choose the latest stable version and download the .zip archive file to your computer.
- Next you should upload the .zip archive file to a folder in your hosting account using FTP or the cPanel File Manager. After that just Extract the archive into the folder you wish your Zurmo CRM to open from.
*Note: Make sure there is a domain or subdomain (eg. mydomain.com; zurmo.mydomain.com) pointed to that folder, unless you desire to open it through a subfolder. Also make sure that the files are extracted in the folder you desire to and not some subfolder (eg. zurmo) as that will make your CRM open through that subfolder (eg. mydomain.com/zurmo).
- Create a database and a database user for it with all privileges using the MySQL Database Wizard in your cPanel.
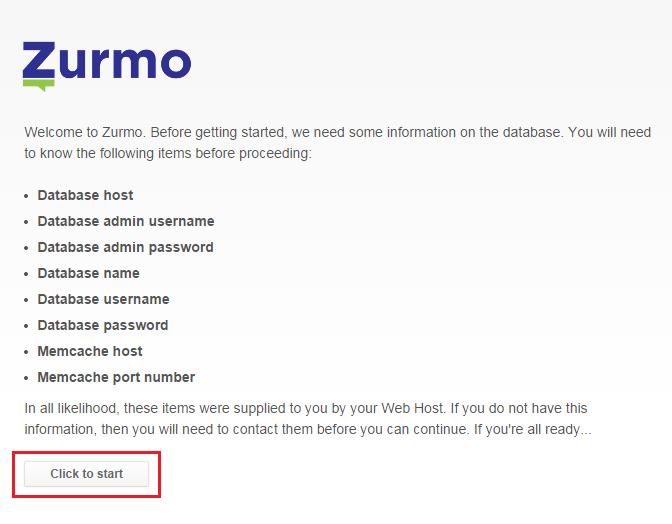
- Open the domain or subdomain you have uploaded the Zurmo installation package to. You can look through the Welcome screen but don’t worry you won’t need all the things specified there to make the installation. Just click on Click to start.
- On the next step the installer will check our system against the Zurmo installation requirements. Our servers are configured to run Zurmo without a glitch but there are some optional services which might give you FAIL or WARNING.
- Our Apache version is 2.2.1 like the minimum required even though Zurmo can’t detect it. The other PHP extensions really are optional and are not required for your Zurmo CRM to run properly. You can however, enable them as well as change your PHP version through the PHP version selector in your cPanel you have with us.


- When you are done and have enabled the PHP extensions you desire from the optional ones, you can Recheck the system and see if everything is as you desire and Continue to install Zurmo manually.

- After that you would have to enter the database information for the database we created earlier. You should also enter your super user password. Remove Existing Data should be ticked as you are modifying an existing database. If you have enabled the memcache PHP extension, you would have to contact us so that we can supply you with the Memcache Hostname and Port Number for the server you are located in. Anything else is either optional or pre-entered for you.

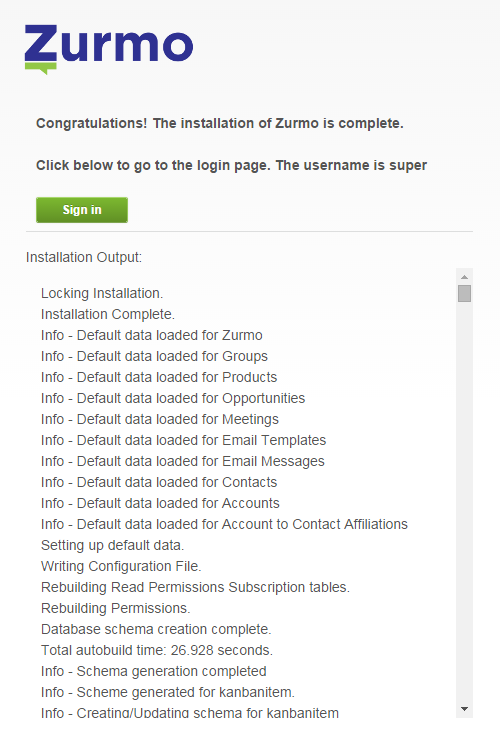
- After pressing Install, the installer will start the process and give you a Sign in link to log into your new Zurmo CRM installation.
Feel free to contact with any questions you might be having or to install Zurmo manually for you. We’ll be more than happy to do so.

