Zurmo CRM comes with a fully functional event/time triggering system which lets you automate and control every operation you do. If you want to lessen your workload by setting default actions to be taken in different situation, you should create Zurmo Workflows.
Zurmo Workflows are highly customizable and can be easily implemented by following these quick steps:
- Log into your Zurmo application.
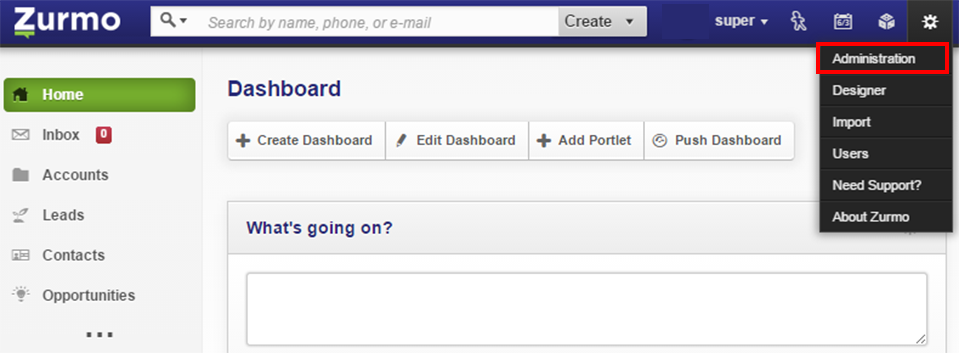
- Choose the ‘settings gear’ on the top right of your screen.
- Select Administration from the drop-down menu.
- Scroll down, find Workflows and click on Configure next to it.

- Click on Create Workflow.

- Choose an On-save or Time-based Workflow for event or time triggers respectively.

- We will choose the Time-based Workflow in this tutorial, as it has one more trigger than the On-Save one and the process is identical.
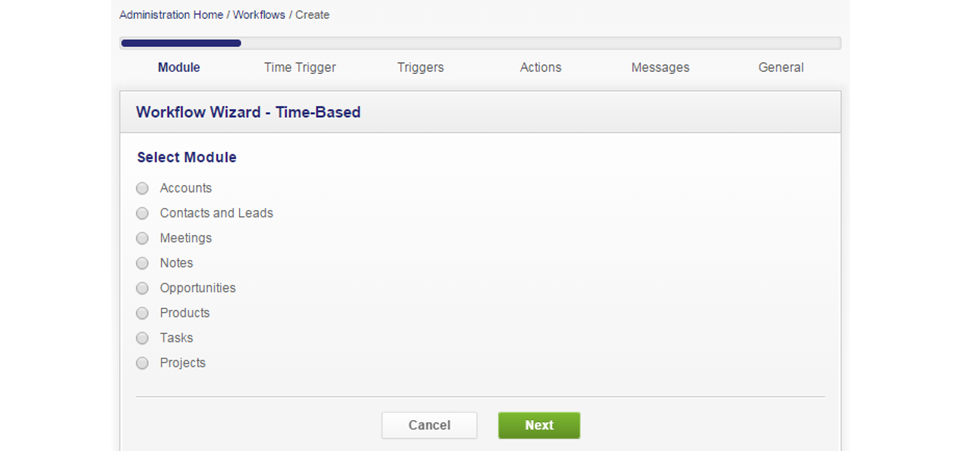
- Select a module you want to use the Workflow on and press Next.
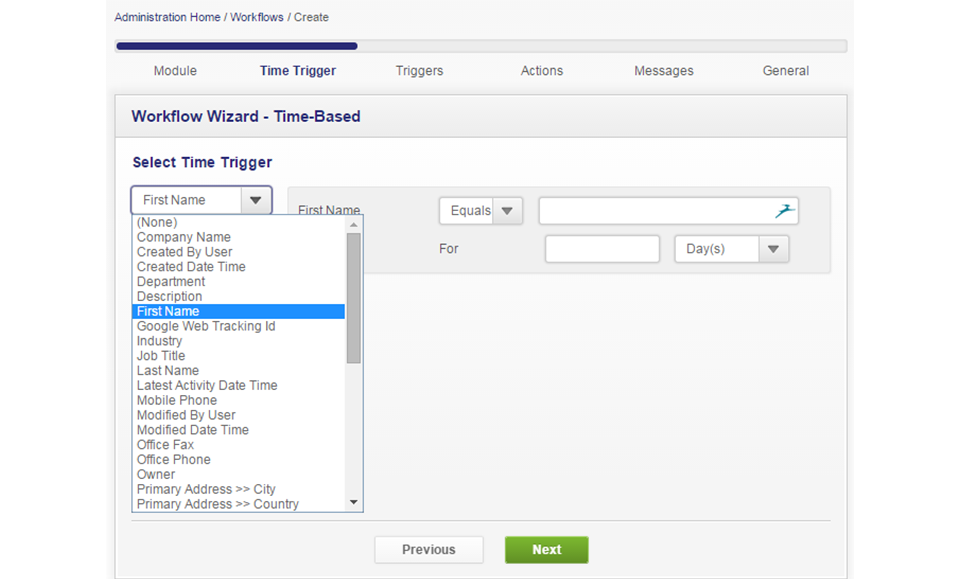
- Enter your Time-Based trigger and press Next.

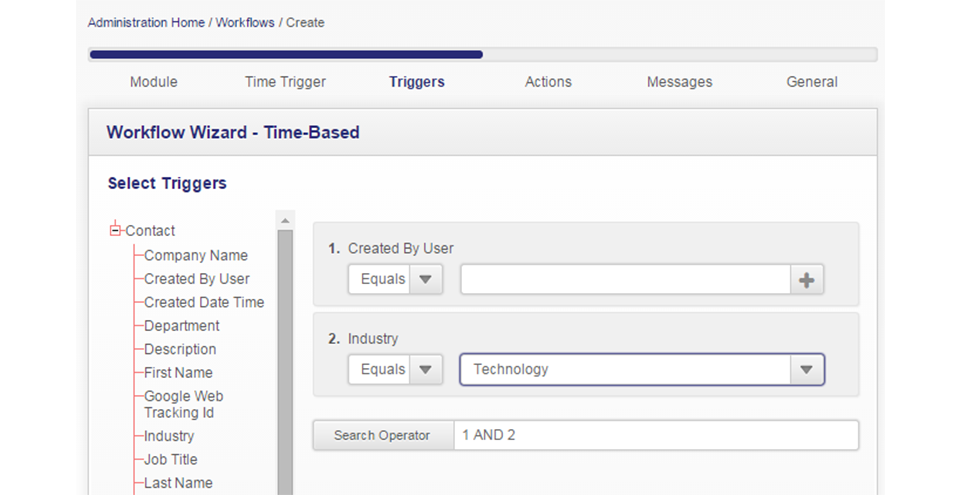
- Choose as many triggers as you want, set their configurations, and click on Next.
- Select as many Actions as you want from the drop-down menu and choose their settings. Click on Save for each of them and when you are ready, proceed with Next.

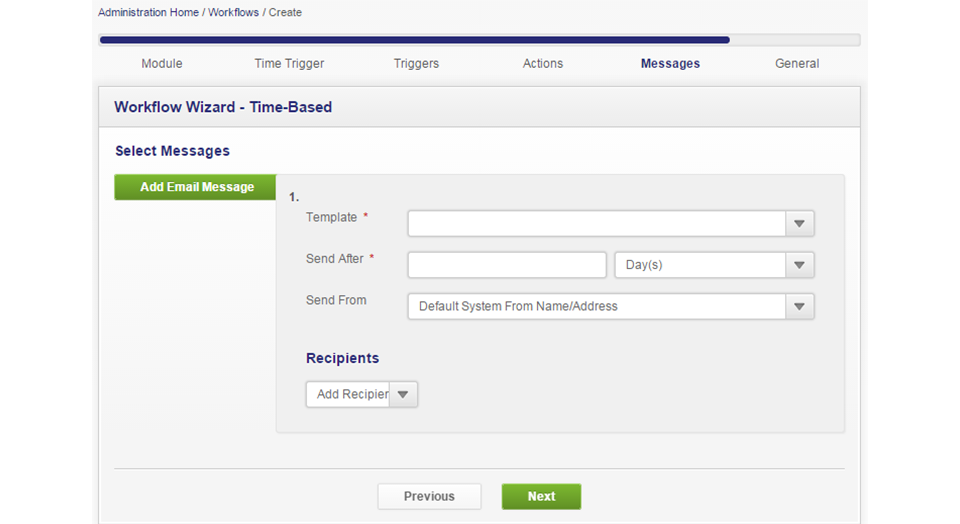
- If you want you can send optional email messages to different recipients with different templates whenever this workflow is triggered. When you are ready click on Next.
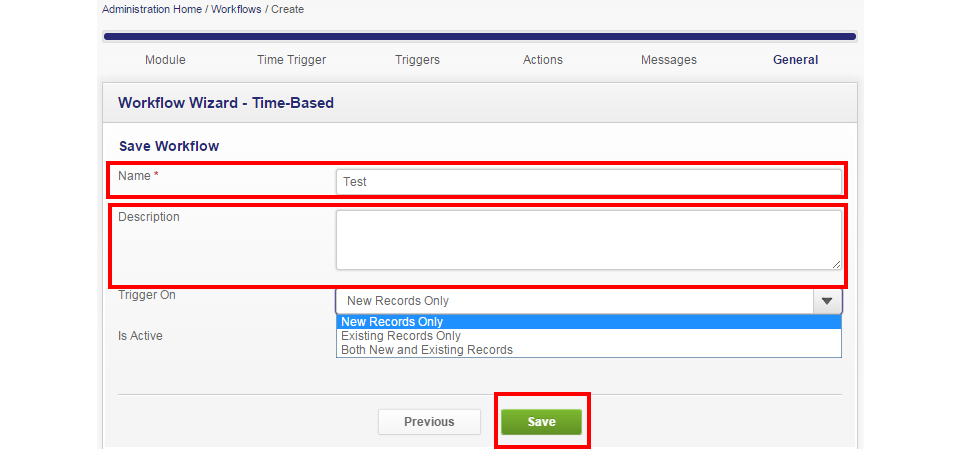
- Enter a Name and a Description for the Workflow, which records it should trigger on, select if it is active, click on Save and that is it. Congratulations you have created your first Zurmo Workflow.